Pages

Monday, April 30, 2012

Hot Like Lava

Sorry to be MIA for so long, I've been traveling for work and really busy trying to get ready for my wedding in August, all this doesn't leave a lot of time for polish changes.

This is a continuation on my attempts at candy coating and I was really quite pleased with the way this turned out.
My base color is Fingerpaints Key to My Art, a pale gold, which I used two coats of.  I then used a top coat with a regular drying time to add areas for my diamond glitter "flowers"  with hex centers to adhere to.  Believe it or not the diamonds were red and the hexes were silver when I started.  This part took the longest but I really liked the way it came out in the end, so totally worth it. 
Once my flowers were in place I used two coats of Kleancolor Chunky Holo Poppy to go over the top.  I didn't mix the bottle to incorporate the glitter and tried to use the straight color on the top.  It gave everything a beautiful stained glass effect while turning it a beautiful lava orange.
I'm really really pleased with how this came out, I think I got it right this time.
What are some of your favorite layered effects? 

Tuesday, April 10, 2012

Random Rainbow

Quite some time ago I purchased some duel use nail art pens on ebay.  They aren't Migi nail art pens by a long stretch and the colors are really quite sheer as you can see, but most of them work and I've really hardly used them at all.  I pulled a few out for this nail art though and I think they're rather cute.
I didn't apply the colors in a traditional rainbow, but rather a more mixed up jumble.  I almost wanted more of a stained glass effect.  I carried the color up almost to the nail bed, but not quite.

Once I had the colors laid out, I used some thin acrylic paint and did wavy lines where each color intersected  It's no my favorite look, and I can think now of ways to improve it but it is what it is. 

Thank you so much for stopping by and reading, I appreciate you all and your comments so much.  Until next time, take care!

Friday, April 6, 2012

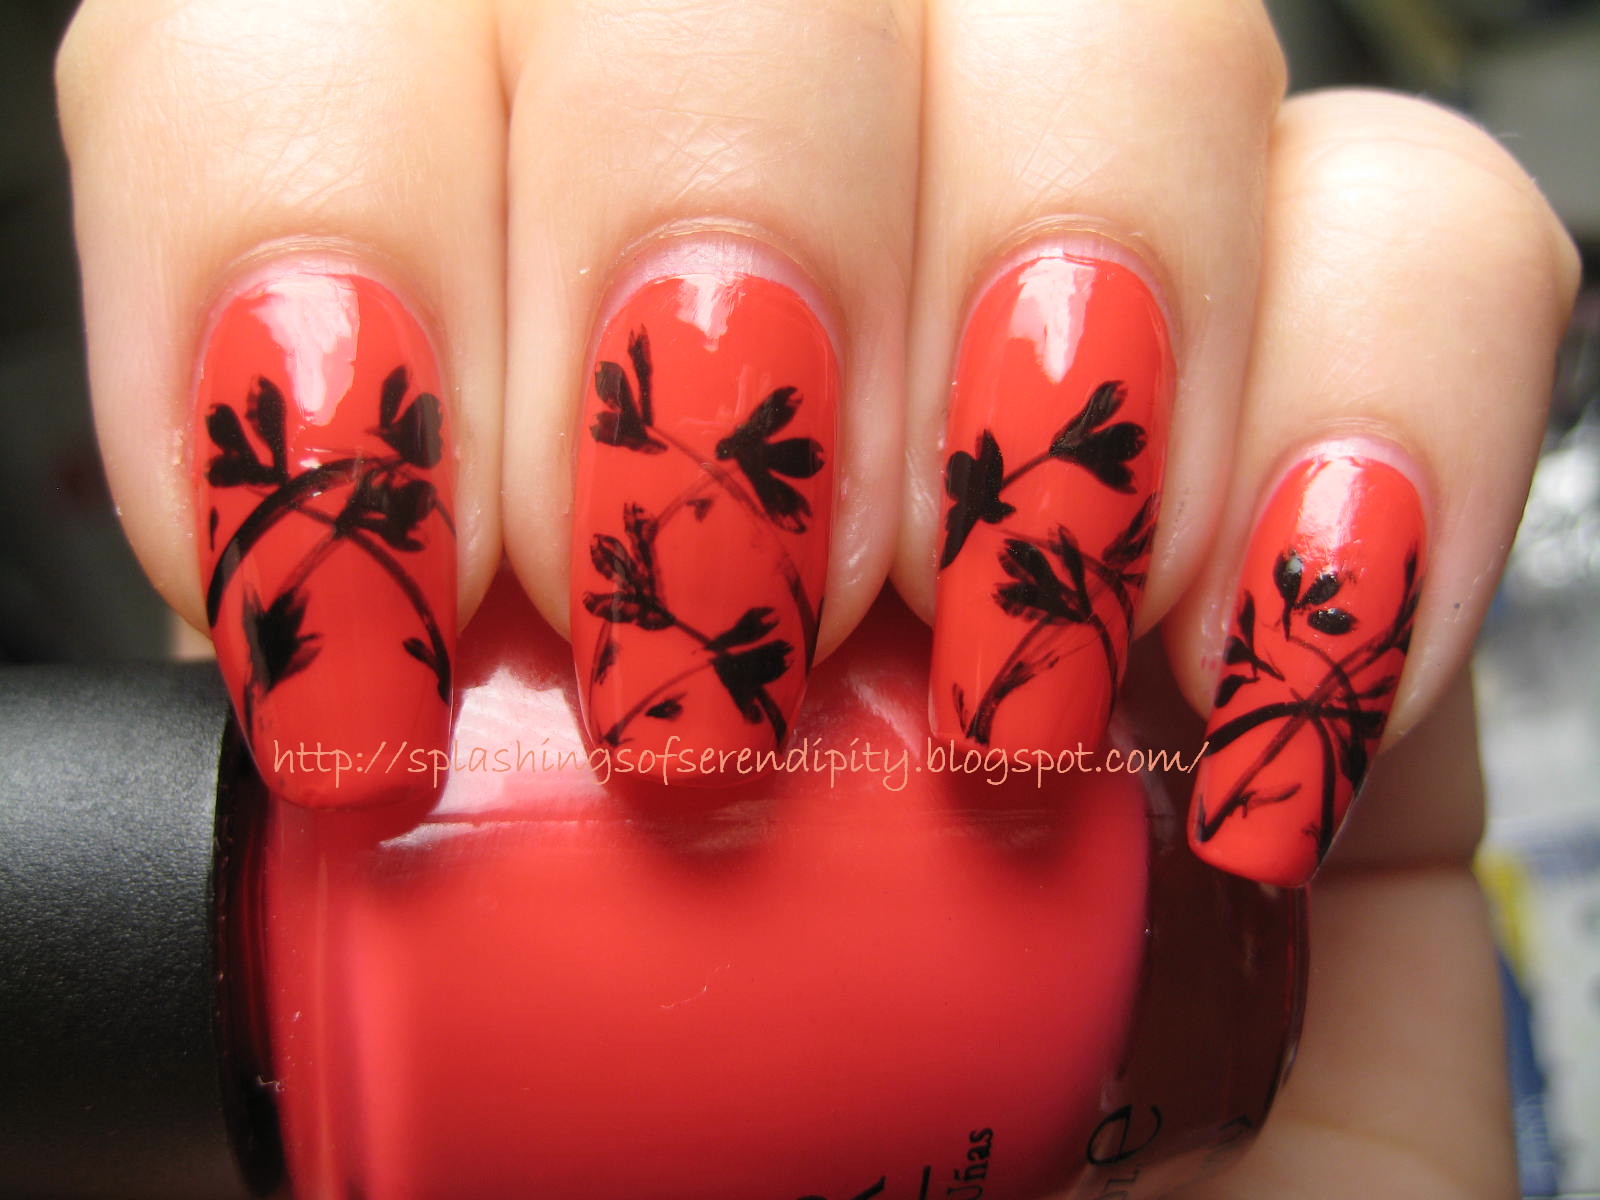
Sunset Silhouette


Sometimes the most striking effect is also the most simple.  I recently picked up OPI Red Lights Ahead...Where?, it's a very bold, bordering on neon shade somewhere between red and orange.  I love the color, but once I got it on my nails, it was too overpowering.  I needed something to tone it down a bit while still keeping the color integrity.

I knew I didn't want to cover the color, or add an additional one to compete or clash with it.  White just didn't seem right but I thought black would work perfectly,  the effect is much like a silhouette against a brilliant sunset sky. 
I used a small angled brush to create the blossoms and a liner brush for the stems.  I really love how this turned out.What do you think, is less more in this case?

Thanks so much for taking the time to stop by and read and comment, I do appreciate it.  Until next time, take care!

Wednesday, April 4, 2012

Dragonfly

It's no secret that I have a weakness for green nail polishes, so when I saw Essie's Navigate Her, it was a case of must have.  It reminds me of OPI's Gargantuan Green Grape which is somewhere in my collection and I'll compare as soon as I take the time to locate it.
The color is a yellowed green and while it is super sheer on the first coat, it's opaque but goopy on the second.  You can see the brush streaks that didn't wouldn't even out in the first photo.  I didn't want to add to the problem so  did not try to use a third coat. 

 I decided to mask the streaking by adding two coats of Zoya Opal which added a lovely opalescent blue green effect. 
 Then it seemed only logical to add a blue and green dragonfly to my accent nail.  I used a dotting tool and black acrylic paint for the body but then decided it was a bit too  stark so I added a bit of no name blue over those.  The wings are teardrop shaped crystals in a similar shade of green that I purchased from my local nail supply store.   I adhered them using nail glue rather than polish and they have lasted for three days of work. 
The look is fun and springy but still simple.  I like the dimensional effect that using the crystals and different colors for the body had on the overall look.

Thanks so much for stopping by and reading, until next time, take care of yourself!

Monday, April 2, 2012

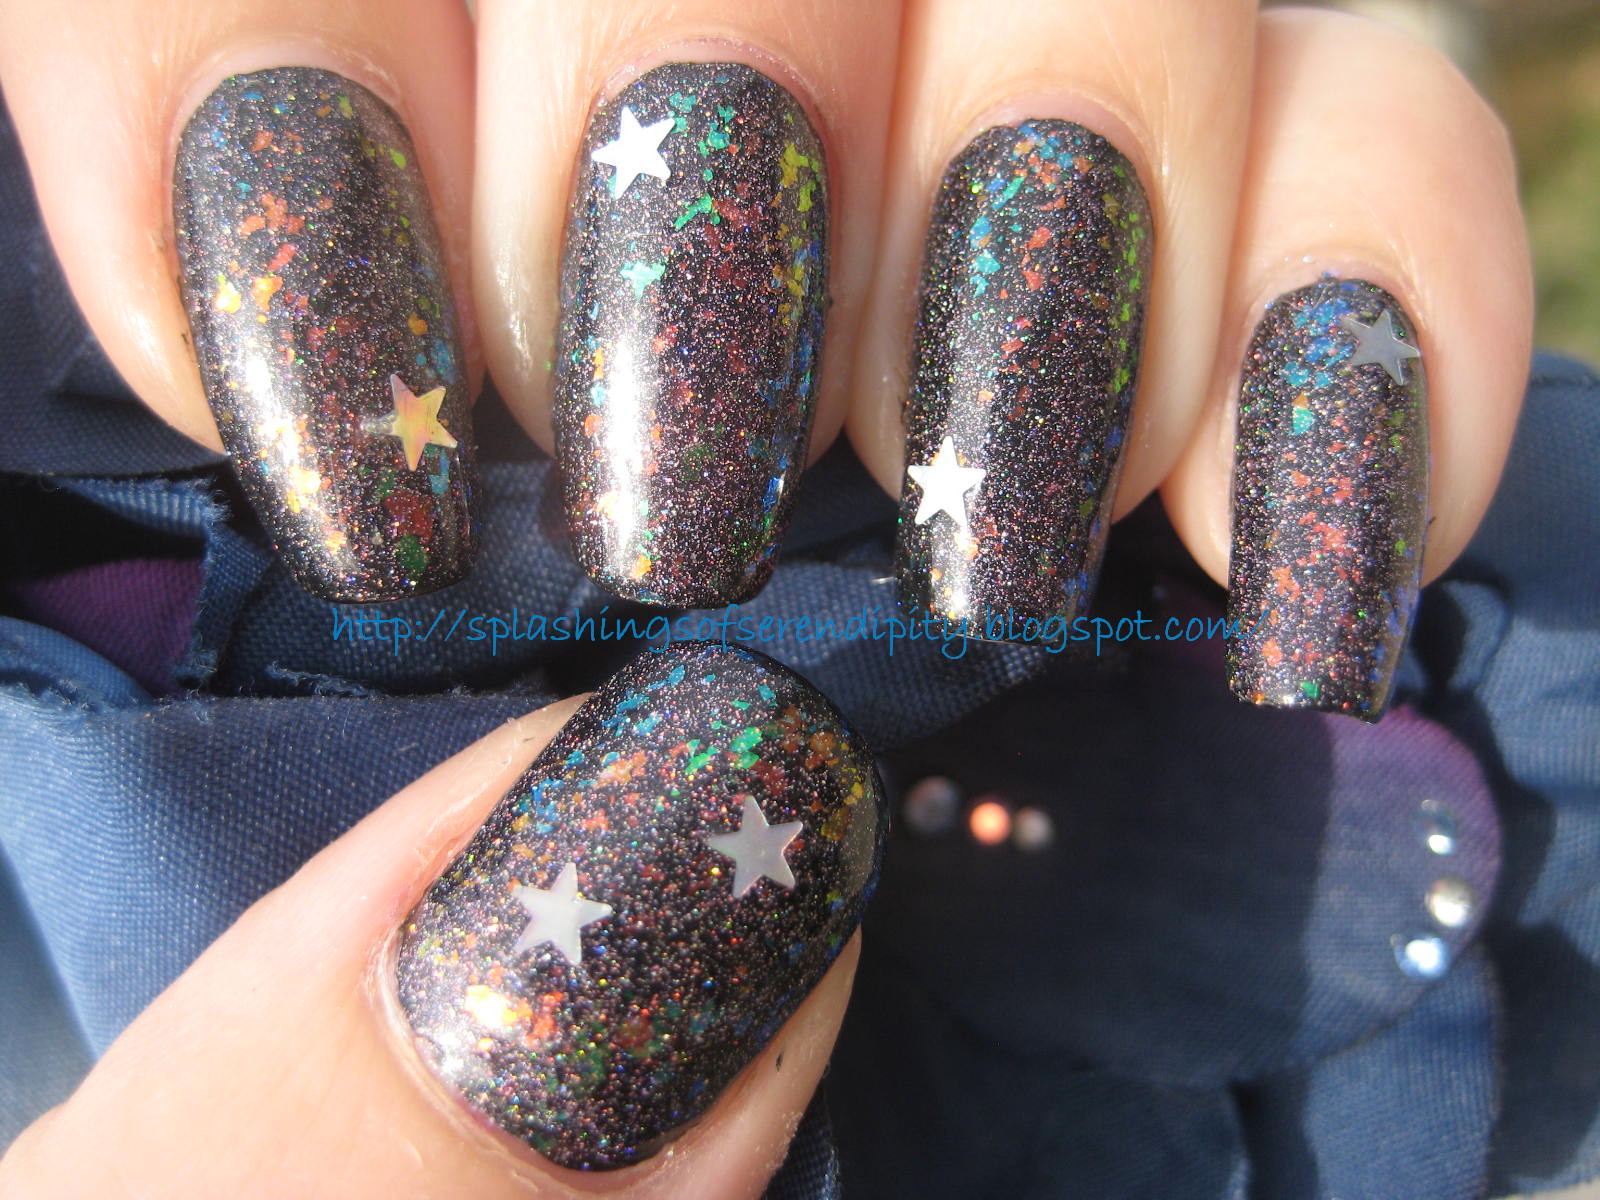
The Lazy Goddess' Galaxy

While being totally in love with the amazing galaxy nail art that I've seen a lot of, I haven't felt the motivation to try the full effect myself.  This is my lazy way to achieve galaxy nails and I am absolutely in love with the way this turned out!  I have gotten so many complements on these nails and I can't seem to keep my eyes off them.  What's more, it's so simple!  Pardon if I get a little more picture happy than usual.

 Belive it or not, this started with a base color of Wet n' Wild Black Creme.  Over the top of that I added about three layers of Wet n' Wild Hannah Pinktana which is an amazing pink based holo shimmer. (Seriously, this is an awesome polish, run and get it now!)
 Once that was in place, I took Finger Paints Flashy and applied it on the diagonal across the center of the nail.  Then I took Finger Paints Flaecked and applied it in the areas in the upper and lower corner of the nail.
 Once that was all in place I applied a regular drying topcoat (not quick) and added  holographic silver stars to each nail, just one or two  depending on the nail size to accent. 
 This was followed by several layers of top coat (the star points had a tendency to try and curl up).  The final effect is even more impressive in person, the pictures just don't do it justice. 
 I felt that this gives me a good galaxy fix without the sponging and effort that some of the other looks require.  I hope you like it and try it yourself sometime. Thanks so much for stopping by and reading.  I love to read your comments, until next time, take care!

Friday, March 30, 2012

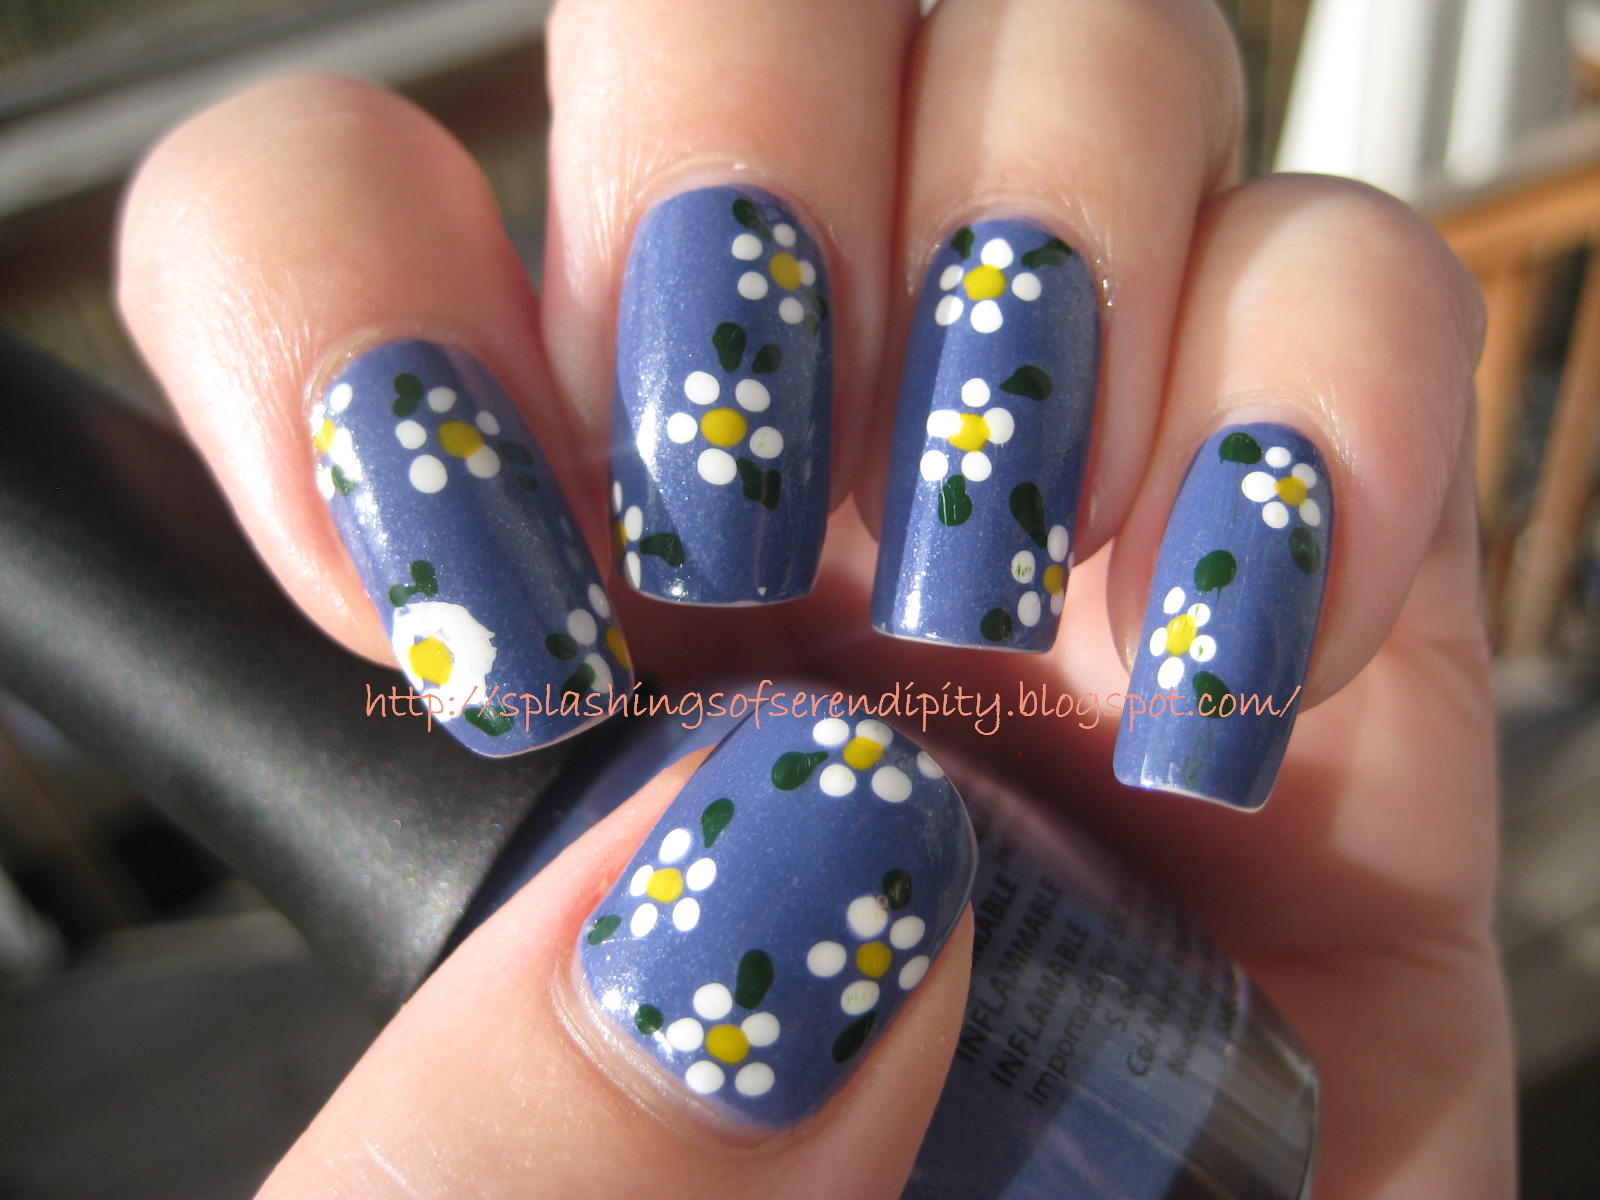
Dotted Dasies

We recently had a home show where I came across  a booth for Migi Nail Art pens.  Being the addict to all things nail related that I am, of course I had to purchase a set which consists of 10 colors.   Since then, I've been trying to think of something simple to test them out on.

I got them primarily for their pen capability even though they have the duel pen/brushes.  I would prefer the brushes be slender liner brushes, but they are closer to full polish brushes.  Given my polish collection I can't imagine my ever needing to use these for full on nail color. 
My base color is Finger Paints Grape Gumball, which in real life isn't nearly as blue tinged as my photos show.  It's got a sweet little hint of shimmer to it, and while being a little thick, applied quite well. 
From there it was a matter of using the Migi pens to create the dotted daises.  It's pretty simple, the bottle is flexible so you just squeeze it and the product comes out.  I love how opaque they are !
I only really messed up one, but I'm I'm claiming it's a fluffy daisy and I meant to do it. :)  Dot and drag on some green leaves, add a topcoat (once everything is dry or you get streaking) and you've got a finished spring manicure.
The only thing I don't like is when they get an air bubble in them and you take the lid off and the product just drips and drips out.  It causes a lot of waste and although I've tried, I can't seem to stop it.   They have a free refill program though which is just amazing so it's not like I'm out the product.   All in all, I'm very impressed and have every intention of getting more.  So have you ever tried Migi nail products?  

Thanks so much for stopping by, until next time, take care.

Wednesday, March 28, 2012

Lots of Layers

After a day at work my nail tips are usually worn, a hazard of having them rubbing against fabric on a constant basis.  While usually I will just change my polish every other day, there are times when I end up with a manicure that I either really like and want to hold onto for another day, or time just won't allow for a full polish change.  Sometimes it's a matter of I really liked a mani I did previously and want to try improving upon it.

This time it's the latter.  I really liked the way my Essie Luxe Effect polishes looked over the black cream and wanted to see what I could do with them.  I applied the polish but then didn't get around to the improving upon part for about a day.  By that time, I had very significant tip wear on my right hand as well as some pretty big chips on a couple of nails.  I needed an upgrade.
I ended up just using more of the Wet n/' Wild black creme to cover the bare spots.  From there I took OPI's Super Bass Shatter and applied a medium coverage coat over all of the nails.  Can I just say how much I love the color!  In the bottle it looks very similar to The One That Got Away from the Katie Perry collection but the shimmer doesn't separate like it does with TOTGA.  I didn't use the Luxe Effects for the patching because I figured it wouldn't be that noticeable one way or the other once I got the shatter on.
Once I'd achieved "shatter"  I took some Orly Sec n' Dry and applied it just to seal things (and because it was handy and I need to use this bottle up.)  Since it's a thinner top coat it doesn't level out at all but did help to seal everything, I've noticed that a lot of my shatter polishes tend to to be heavy drinkers when it comes to top coats.  Lastly, I applied a two coats of Seche Vite.  It smoothed over everything beautifully.  I did apply a butterfly sticker between coats on the middle finger.
So all told, I have anywhere from 8 to 10 layers of polish at this point and it's worth every one.  I love how this looks, almost more than I did the original look, I think that Super Bass coordinates with and sets off the Luxe Effects beautifully.  The Luxe Effects peek through with flashes of gold, orange and green, be still my heart!

What do you think, a winning combination?

Thank so much for stopping by and reading, leave me a comment telling me if you liked this look.  Until next time, take care!