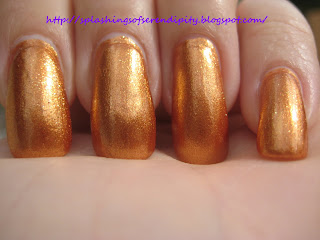
As I was putting on OPI's Rising Star I was contemplating how I could turn it into another more glamorous Halloween look, I wanted to fit just one more in. Ug, can you believe this month is over!??
Anyway, here's what I came up with, and since my last tutorial was a hit, and this look is really simple and can be used with a variety of color combos, I figured I'd do another one.
 With embellishment
 I must admit that I wish I'd left the jewels off, they just don't go with the look like I'd hoped.
Moving onto the tutorial!
 Step 1: Apply your base coat and base color, (OPI Rising Star.) Make sure it's completely dry and apply french nail guides as shown.
 Step 2: Apply a darker color (Orly Out of This World) to the area above the guides. Carefully remove the guides and apply a quicky drying top coat (Seche Vite) and let dry completely.
 Step 3: Your nails will look like this, now you're going to take a fresh set of guides and using the diagram shown place them on your nails. The guide edge placement is important to achieve the crescent shape.
 Step 3 cont.: Once your guides are in place, take your final color (OPI Take the Stage) and paint the area below the guides.
 Step 4: Remove the guides, your nails will look like the pic above. Apply another top coat to smooth things out, you can also add embellishments if you like. Now sit back and enjoy.


